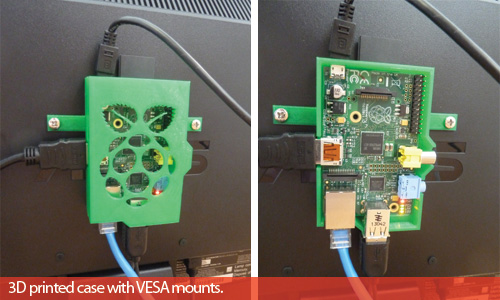
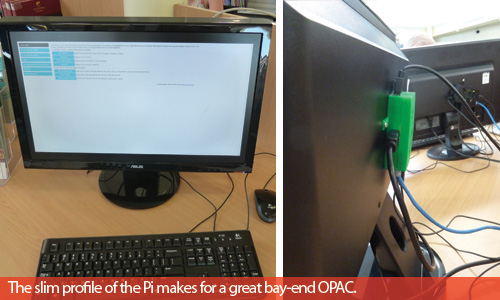
A while ago I got the idea to use Raspberry Pi’s as replacement OPACs in my library. Cheap, linux based computers with a very small footprint made them the ideal choice for slim mount terminals on bay ends. Sadly there were issues with mounting them on the ends of shelving units (no power, networking etc.) so they just remained where they were for now but they still work.
There is only one supplier of Raspberry Pi’s in Australia and that’s Element14 who were very helpful in setting up invoicing with our council which is always handy (they have lots of cool robotics tech as well but I prefer to use Altronics (big discounts for libraries/schools and will invoice) or Jaycar Electronics for my smaller electronics needs as they are both local).
Since I already had two DVI capable 24″ monitors, keyboards and mice, I purchased two Pi’s, two flash memory cards with NOOBS pre-installed, HDMI cables, HDMI-to-DVI converters, USB cables, two USB power supplies (if your terminals are next to each other you could get a double USB power supply and save money/power space). All up it cost about $50.00 AU each.
To save some money and to mount the Pi’s on the back of the monitors I printed out two Pi cases that had VESA mounts attached from Thingiverse on my 3D Printer. These worked really well and keep the Pi’s secure behind the monitor and makes for a neat install.
I installed Raspbian and setup the auto start scripts to run Chromium in kiosk mode and pointed them both in the direction of our OPAC (see how-to below), all up it took about 15 minutes from unboxing to having one up and running (plus the few hours of research before hand).
Problems and issues
Nothing is without problems but so far the Pi setup has minimal issues. One error that I have encountered is the browser will often close and the Pi will display a black screen. Right clicking will reveal a menu that you can select ‘Terminal Emulator’ and enter the command *$ sudo reboot *and the device will reboot, you can also just pull the USB power and manually reboot but the command is a better way to shut the device down. Once rebooted the device displays the kiosk and works fine.
I have yet to figure out if this is the Pi crashing or user intervention (ie. people hitting random keys/intentional). It also doesn’t help that our OPACs have several links to other pages (Trove, SLWA, ABS, Zportal, online events bookings) which can cause errors or link outs that allow clients to change the page. When I tried to remove these other links and have a pure internal OPAC only we received several complaints from clients and had to restore them.
Overall
Running a simple HTML page for catalogue searching is fairly easy for the devices and seems to run fine so far. I’d like to get a few more so I can set them up as programming devices and run some intro sessions for the public to expand my makerspace ideas. I would not use a Raspberry Pi as a replacement for any public access computers for general web browsing but as replacement OPAC terminals they do the job just fine. They would also be handy for any type of ‘pop-up’ library where you wanted catalogue access and a slim terminal with minimal fuss.
How-to
This will take you through setting up a Raspberry Pi web OPAC instance from scratch. You will require a Raspberry Pi with NOOBS (New Out Of The Box Software) installed on the flash card.
Install OS
When booting for the first time using NOOBS (or holding ‘SHIFT’ on reboot for recovering an existing install) you are presented with the Pi Recovery Screen
- Select and install Raspbian [RECOMMENDED]
- Follow the setup instructions
- Turn on the GUI if required (all commands can be run from terminal)
Install Browser
- Open Terminal (if running from GUI)
- Install updates
$ sudo apt-get update && apt-get upgrade –y - **Install Chromium
$ sudo apt-get install chromium x11-xserver-utils
Disable Sleep
- Edit the lightdm.conf file
$ sudo nano /etc/lightdm/lightdm.conf - Add the following lines to the [SeatDefaults] section
xserver-command=X –s 0 dpms
Hide Cursor When Not Active (optional)
- Install Unclutter
$ sudo apt-get install unclutter
Configure LXDE
- Edit the LXDE autostart file
$ sudo nano /etc/xdg/lxsession/LXDE/autostart - Comment out everything (add # in front of each existing line) and add the following lines
*@xset s off
**@xset –dpms
*@xset s noblank
*while true; do
** chromium –kiosk –incognito http://yourlibrarycatalogue.html
*done
Reboot
- Reboot the Raspberry Pi
$ sudo reboot
Your install is complete.

