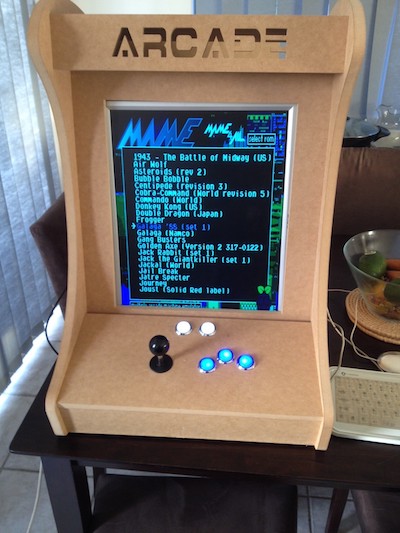
It took a weekend of swearing but it’s alive!
A while ago I got the wonderful idea to run an adults event teaching library clients how to turn a Raspberry Pi into a retro arcade cabinet. The event went quite well as I had the funds to give clients their own Pi to take home (they’re not that expensive and I limited to 10 Pis). Limited Pis meant encouraging groups so I ended up with families coming along, couples, friends and even one group of four gentlemen who wanted to try their hand at programming! As always I learnt some lessons, the first being that trying to run updates on 10 Pis on the same public network is a good way to ensure everyone gets stuck watching an update bar for 40 min. The second being that I should have asked for help running the session (why do I do this to myself?) and the third that I needed good instructions so people could self direct. This walkthrough will show you how to set up your Raspberry Pi to run an arcade emulator, from scratch. Run in a library session it’ll take about an hour to do the basic Pi setup and have a working system, just make sure you have a fast internet connection or stagger the updates.The owners of Arcade Worx in WA are increadably helpful (who turned out to live near me!) and even offered my clients a massive discount if they wanted to buy a cabinet after the event. In2Amusements turned out to be a another WA company in Fremantle and supplied all the buttons and wiring. It’s well worth building relationships with any local supplier as you never know what can come from it.
I ended up borrowing heavily from the following two guides: Adafruit.com and Project Mame.
Part list
- Raspberry Pi (including all cables/SD Cards)
- Keyboard
- Mouse
- Montior
- Cat5 cable (or wifi Pi adaptor) for internet connection (setup only)
Optional
- Arcade cabinet – I went with a 1 player Bartop but there are lots of options.
- Buttons and joysticks – I went with light up blues and whites, very classy.
- Adafruit Small-Size Perma-Proto Raspberry Pi Breadboard PCB Kit – also available from Element14
- GPIO ribbon cable – also available from Element14
Setup
Install OS
After unboxing your Pi and plugging in keyboard, monitor and power we need to install an operating system.
NOOBS (New Out Of Box Software) is pre-installed on the SD card, simply plug it in and turn on the Pi to start the NOOBS boot sequence. ProTip: NOOBS is intended to give a quick start to your Pi, it has several flavours of linux setup for you to choose from.
- Boot into NOOBS
- Select Raspbian [RECOMMENED]
- Select Install OS
- Wait till Raspbian installs and proceed to config settings
Config Settings
When presented with the Raspi-config adjust the following (items in red are optional and not required):
- Set timezone (option 4)
- Change hostname (suggested: arcade)
- Change password for “pi” user (default is “raspberry”)
- Change memory split (at least 64MB to the GPU)
- Enable SSH server (for admin access over a network)
- Overclock settings: Medium (as we are running games)
- Select Finish and reboot the system when prompted.
Do not enable start desktop on boot, we will be running X11 (Graphical User Interface) manually when needed.
***NOTE: You will need an Ethernet cable attached to the Pi, if using wifi Adafruit have a handy guide to networking your Pi ***https://learn.adafruit.com/downloads/pdf/adafruits-raspberry-pi-lesson-3-network-setup.pdf
Updating Your Pi
When the command line appears (should look like this pi@arcade $) type the following and wait for the updates to run:
sudo apt-get update
Once the update has run then run the upgrade:
sudo apt-get upgrade
Install Emulator(s)
There are several emulators you can run on the Pi:
- MAME4ALL – classic arcade games
- PiSNES – Super NES
- Pcsx_reARMed – PlayStation 1
- Atari800 – Atari 8-bit.
You can install all but MAME4ALL via the Pi Store (located as an icon on the desktop).
We’re going to install MAME4ALL. Feel free to install the other emulators after and look at other programs in the Pi store.
Download MAME4ALL
From the command line, type the following:
startx
This will run the GUI for the Pi, this makes it easier to install programs when you are not used to the command line format of Linux.
Open Midori, located on the desktop, this is the default web browser for the Pi.
Type in the following address in the address bar:
http://sourceforge.net/projects/mame4allpi/
Download the .zip file on the page using the link next to ‘Download it from:’
You will see a download bar at the bottom of the web browser. When it is completed, click the icon to the right of this bar (Note: do not click the red X as this will cancel the download).
Installing MAME4ALL
When the .zip file is open use the extract button (icon looks like a box with an arrow on it).
Extract the files to /home/pi (should be default).
Close the file manager.
Your emulator is installed.
Installing ROMs
Now our emulator is installed we can add games.
“A ROM image, or ROM file, is a computer file which contains a copy of the data from a read-only memory chip, often from a video game cartridge, a computer’s firmware, or from an arcade game’s main board.” – http://en.wikipedia.org/wiki/ROM_image [accessed 10/6/15]
Download ROM files
Open Midori again and go to the following link:
Select the game(s) you wish to install and download the .zip file(s).
Save them directly to the /home/pi/roms folder.
You do not need to unzip these files as the emulator requires the game in .zip format.
Repeat for any other games on the link above.
Running the Emulator
Now we are ready to run the emulator and play some games!
Open the file manager
To access the file manager click your left button on the file manager icon or left click on the LXPanel (far left icon) and go to the accessories menu and click on the file manager.
A window will open displaying a list of files and folders.
Running MAME
Under the home Pi icon you will find a lot of folders and icons.
Find the one that says MAME and has a cog icon.
Double click this icon and select ‘Execute’
MAME4ALL splash page should display and a list of installed games should soon follow.
Congratulations, you now have a fully functioning arcade machine!
Controls
These are the standard MAME key definitions as follows. All MAME keys are also available.
Keys LControl, LAlt, Space, LShift are the fire buttons
Cursors Keys for up, down, left and right
Keys 1 & 2 to start 1 or 2 player games
Keys 5 & 6 Insert credits for 1P or 2P
Key Escape to quit
Key TAB to bring up the MAME menu
Function Keys: F11 show fps, F10 toggle throttle, F5 cheats, Shift F11 show profiler
Key P to pause
Optional
The following are optional extras.
Change Orientation
If you wish to change the orientation of your monitor you can type the following into a command line (your Pi will boot to a command line or you can open the Terminal application on the desktop):
- sudo nano /boot/config.txt
- Add the following display_rotate=1
- Reboot the system
Auto Boot
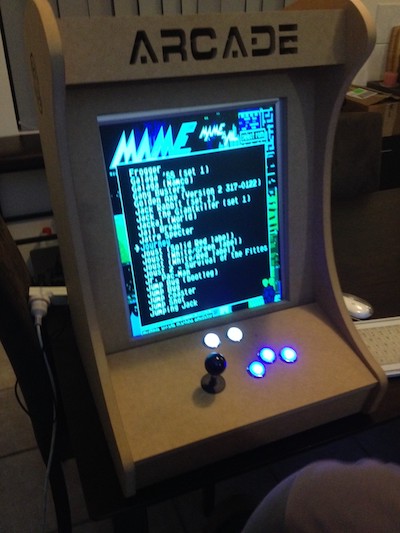 It looks crisp in the dark!
Note: Do this after you are happy with your setup.
To auto boot your emulator so it runs as soon as the Pi is turned on, type the following into a command line (your Pi will boot to a command line or you can open the Terminal application on the desktop):
- sudo nano /etc/rc.local
- Before the final ‘exit 0’ line insert the following:
- /home/pi/mame &
- Save the file
- Reboot the system
Wiring
If you’ve gone the arcade cabinet route then you’ll want to look at the following two guides to help you connect all your controls to your Pi.
- This Adafruit guide covers how to wire the controls to your board and the software side
- This wiring guide will help when connecting all your micro switches.
That’s it! Enjoy your retro gaming and remember you can take out the SD Card and use your Pi for another project (a new SD card) and simply pop it back in when you need an arcade fix!